Acrylic nails, with their range of shapes, colors, and designs, have become a popular means of self-expression. This article will guide beginners through the intricate process of acrylic nail application.
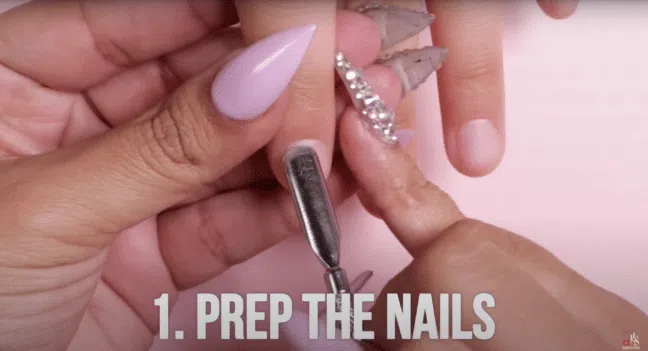
Starting the process with clean and prepared nails is crucial. Dead tissues around the cuticle area must be removed carefully, ensuring not to apply too much pressure, as this can damage the nail bed. In addition, it’s essential not to push the cuticle at an excessively shallow or steep angle to prevent cutting your client. Once the cuticles are gently pushed back, a medium to fine grit sanding band is used to remove the natural shine of the nail.

For a more detailed cleaning process, you can use a tapered cuticle cleaning bit. It helps get into the smaller channels of the sidewalls and the cuticle area. Once all fingers are prepped, nail tips are fitted. The tip should fit from sidewall to sidewall, neither hanging over nor too thin, as an ill-fitted nail tip can increase the chances of lifting. The tip is then applied to the edge where the free edge would start, leaving enough of the natural nail bed to give the acrylic something to adhere to, forming a proper foundation.

The applied tip is then trimmed to the desired length and shape. Before filing the nail, it’s crucial to dull the sharp edges of a new file to prevent any cuts. Shaping the tip before applying acrylic helps maintain the shape post acrylic application, making the finishing process smoother.

Once the nail is shaped, a sanding band is used to remove the ledge between the nail tip and natural nail, which aids in better adhesion of the acrylic.

The nails are then prepped for acrylic application using a dehydrator and primer. Both should be applied only to the natural nail bed.
For a smoother color change during the client’s next visit, a thin layer of clear acrylic powder is laid before the color acrylic application. This way, when the client returns, the technician only needs to file down to the clear layer and apply the new color.
Acrylic bead consistency is vital for a strong and aesthetically pleasing result. Beads can either be too wet, resulting in lack of control and weak structure, or too dry, making the application process challenging. The perfect bead has just enough monomer – not too much to cause dripping, and not too little to make it dry.

Acrylic application can follow either a three-bead or a two-bead method. In the three-bead technique, the nail is divided into three zones. The first bead is placed at the free edge of the nail, the second in the middle (which creates the apex or the thickest point for strength), and the third bead is placed at the cuticle area. Each bead should seamlessly flow into the other for a smooth finish.
The two-bead method, on the other hand, uses only two zones – the free edge and the nail bed. After applying the colored acrylic, a layer of clear acrylic encapsulates the color to complete the process.
With these techniques and a bit of practice, beginners can master the art of acrylic nail application, creating durable and visually pleasing results for their clients.
Watch the full tutorial by Kiara Sky Nails and don’t forget to subscribe to their channel!
Disclosure: This post may contain affiliate links, meaning we may earn a commission if you make a purchase through these links, at no additional cost to you.